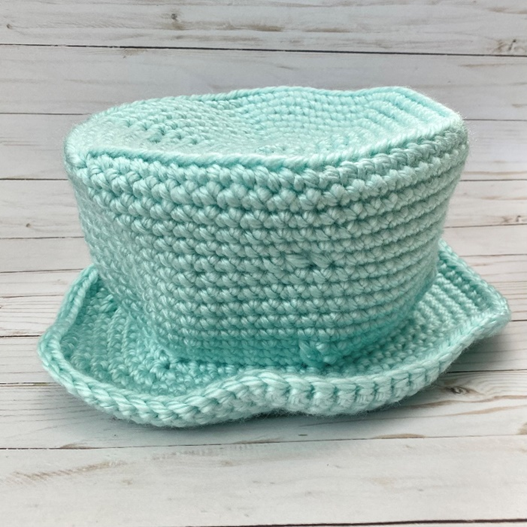
This is a hat pattern that is based on measurements rather than a number or rows, rounds, or stitches. It will make a mini top hat or "pork pie" hat with a rolled brim.
Hook Size
- Hook Choose the hook size listed on the yarn label or a size down.
- Measuring tape or tool
Yarn
- 1 Skein Worsted weight yarn Use a yarn that is more sturdy as opposed to soft. Alternatively, you could use 2 strands together of less sturdy yarn.
Instructions
Pattern for Crown
- Make a ring in any manner that works for you. I chained 4 and connected.
- Round 1: 12 dc into the ring. I do the first as a standing double crochet instead of doing a chain. If you prefer to start with a chain, do two chains and do NOT count as a stitch. Slip stitch into the first dc.
- Round 2: Start each round the same way until you reach the desired measurement for the crown. Do a front post single crochet around the first stitch. Ch 2 (or omit the the ch 2 and do a standing dc). Front post dc around the SAME stitch. Dc in the space between the first dc and second dc. Front post double crochet around the next dc. Continue this pattern around ending with a stitch between the last dc and first dc. Slip stitch into the first dc. (24 dc)
- Round 3: Start the next round the same way you did the round before. If you used the 2 ch method, make sure you are wrapping around both the ch2 and the dc when doing the fpdc stitch. Dc into the space between the first dc and the next dc. Dc into the next dc. Fpdc around the next dc. This should be the same dc that was the fpdc in the row below. Continue in this pattern around. (36dc)
- Rounds 4-?: Start the next round the same as the previous rounds. Each round is a similar repeat of the round 3. The first dc is always between the stitches. This is where we are increasing. Then dc into the regular dc stitches from the round below. Then fpdc around the fpdc from the previous round and finish with a slst. Continue until the crown reaches the correct measurement according to the chart. I have a smaller head so I stopped at 6.5 inches in diameter.
Pattern for the sides
- Round 1: Ch 1, 1 sc in the BACK LOOP of each dc from the previous round. This will start the sides of the hat.
- Round 2: Standing dc (or ch 2 and then dc into same stitch. Do not count ch 2.). Fpdc around the next stitch, dc in next stitch.
- Round 3-?: Standing dc (or ch 2 and then dc into same stitch. Do not count ch 2.). Repeat the alternating pattern – fpdc around the same fpdc from previous round and dc into the next dc. Continue this same pattern until your hat has reached the desired height (or use chart for measurement).
Pattern for brim
- Note: After the first round, your brim will start to curl in on itself. When you have finished the brim, actively roll it in.
- Round 1: Ch 1. Sc in each stitch around. Slst to first sc.
- Round 2: Ch 1. Sc in the next 7 stitches. 2 sc in the next stitch. Continue pattern around. Since this hat is made by measurements instead of a set number of rows, you might find that your last repeat will not work out quite evenly and might have a few extra stitches beyond 7, or a few less. That is okay.
- Round 3: I just continue into the next stitch with my first sc. You can use a stitch marker to mark your place. OR ch 1 and sc.
- Round 4: Sc all the way around.
- Round 5: Sc in the next 8 stitches, 2 sc into the next stitch. Repeat pattern all the way around. Again, the last repeat may end up not quite 8 stitches.
- Round 6: Sc in each stitch around.
